Models
Learn how to define models for Zacc to work perfectly with your documents

Add / Rename / Remove a model
Adding a model
- Go to the Models view
- In the bottom left of the view, click the “+” button
- Enter a name for your model
- Drag & Drop a PDF in the center of the view
- Configure the zones for each field (cfr the Configuring Fields section)
Renaming a model
- Go to the Models view
- Select the model to modify
- Click on the name of the model. You can now edit it.
- Enter the name then click outside the name field to apply the changes
Removing a model
- Go to the Models view
- Select the model to remove
- Press the “-” button at the bottom left of the screen
- Press “OK” when asked if you are certain
Zone selection - IMPORTANT
Note: Zone configuration is very important for Zacc to shine. Make sure to do that properly.
Configuring a zone – principles
Basically, Zacc needs to know where to find the value you want him to find.
To achieve that:
- In the models view, select a model
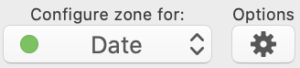
- In the dropdown menu above your document, select a field. Example: “Amount”
- Select the text with one of the selection tools:
- Text selection tool: with this tool, you select the text
- Rectangle selection tool: with this tool, you define an area around the text to select. Zacc will then find the text inside. A character must be entirely inside the rectangle to be selected.
- Define a Trusted Neighbour: this is not mandatory, but highly recommended since it will greatly improve Zacc’s capacity to retrieve exactly what you want. Learn more about the Trusted Neighbour in the next paragraph.
- In some cases, define the extra options for the field. Example, for the “Date”, you must configure an extra option for the format to be accurately recognised. Lean more about the extra options below.

Configuring a Trusted Neighbour ( ! important ! )
A Trusted Neighbour is like the best friend of the extracted value, it’s always there, and always at the same relative place. When configured, Zacc will not cease to impress you with his accuracy.
As an example, imagine the total amount of an invoice. Its position might vary from one invoice to another, depending on the number of items composing the invoice. More items push the total towards the bottom of the invoice. The Trusted Neighbour in that case would be the word “Total” because it is always located on the left of the amount, at the same distance.
To configure a Trusted Neighbour:
- Select a field and configure the zone (cfr here above for how to do that)
- Click on the “Set Trusted Neighbour (recommended)” Button
- Select the Trusted Neighbour value with one of the selection tool
- Press the “OK” button to validate

Fields options
Fields options offer extra flexibility or accuracy. Select a field then click on the “Options” button to display these options.
Amount extra options
- “Positive amount = expense”: enabled by default. When enabled, Zacc will treat the amount of the invoice as an expense. When disabled, Zacc will treat the amount of the invoice as an income.
Date extra options
- “Choose date format”: In the dropdown (list) menu, select the format matching best the date of the invoice
- “Advanced setting”: Do not use this unless you encounter issues. When enabled, you are required to enter the exact ISO8601 format of the invoice. An example is : “dd/MM/yy” that would match “24/02/20”.
- dd matches the days (ex: 03, 14, 28, 31)
- MM matches the months in short number format (ex: 03, 10, 12)
- MMMM matches the month in letters (ex: January, March, …)
- yy matches the last two digits of the year (ex: 19, 20)
- yyyy matches the four digits of the year (ex: 2019, 2020)
Category extra options
The category field does not take its value from a zone. You just need to define the category for the model. You do that in the extra options for the category field.
You first need to define categories in the Categories View. Please refer to the Categories section of this documentation.
Description extra options
For the description, you might want either:
- define the value from a zone
- define a constant value
To define a constant value, you do that in the extra options. If both a zone and a constant values are defined, Zacc will choose the constant value.
Custom fields
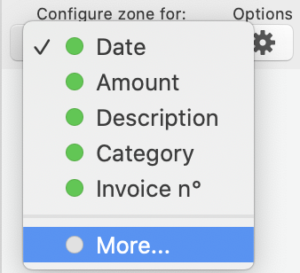
Zacc allows you to create custom fields. In the image below, a custom field “Invoice n°” has been created. You can define a zone or a constant value for that field.
Creating a custom field will automatically create a new column in the Expenses view.
Creating a custom field
- In the Models view, select a model
- In the Fields dropdown (list) menu, select “More…”
- The following screen appears

- You can add or remove a Custom Field with the bottom “+” and “-” buttons
- You can rename a Custom Field by selecting it and clicking on its current name
Once created, you can configure a zone or a constant value for that Custom Field.